Saturday, July 26, 2008

Bavarian Comfort Food: Käsespätzle

Wow, it sure has been a while since I posted now. As the semester moved towards its inevitable conclusion, I was increasingly swamped in homework, then cramming, and lastly a little crescendo of exams. I did manage to get through it relatively unscathed, but I did feel a bit like a character from an old cartoon: all confused, and with a flock of little birds flying around my head, chirping something about statistics and stock portfolios.

This tuesday, however, it was finally over, and I could go back to spending all my time either thinking about, cooking, or eating food. Which I happily did, and as the weather took a turn for the worse, what better way to come back down to earth than some hearty comfort food?

IMG_3492

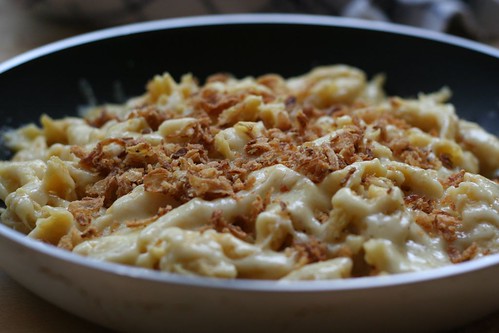
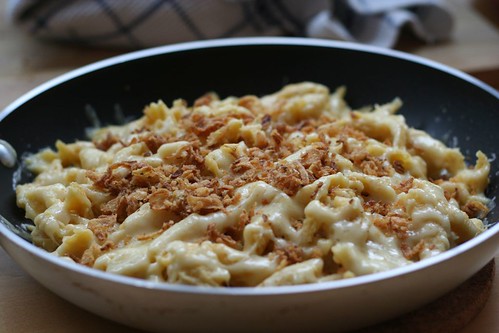
Allgäuer Käsespätzle are the local, and much better tasting, version of Mac and Cheese. With the little knobs of slightly firm pasta known as Spätzle, mixed with crazy amounts of cheese and topped with fried onions, Käsespätzle is stringy, gooey, rich, comforting and delicious.

If you live in Bavaria, and are feeling lazy, you can easily buy decent Spätzle in any supermarket, but that's not how we roll here at Butter & Beans, oh no. Back in March, I lived in another student dorm, and when I realized one of my lovely neighbours there was an honest-to-God Allgäuer, I forced her to teach me the fine art of Spätzle making. This recipe is dedicated to her; thank you, Tanja!


Allgäuer Käsespätzle
Serves about two people.

If you ever pass through Bavaria, or know someone from the area, get them to set you up with a Spätzlehobel, and this will all be much easier. However, the recipe below will use the Real Man method, without need for special tools.

When it comes to cheese, if you want this to be real Allgäuer Käsespätzle, go for a mix of Allgäuer Emmentaler and Bergkäse. You could also use Appenzeller, or Le Gruyère, or basically any Swiss style cheese of alpine descent. Use a mix of mild and sharp cheeses to get your perfect taste profile.

Ingredients

250 g flour
5 eggs
2-4 Tbsp water
1-2 tsp salt
150-200 g cheese
1-2 onions, red or yellow
butter

Instructions

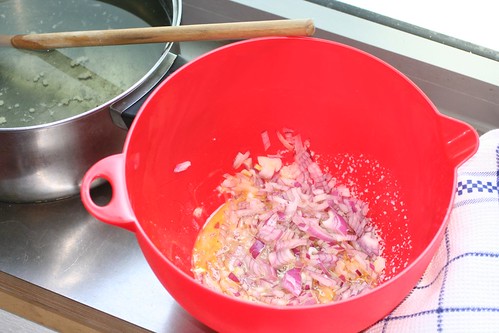
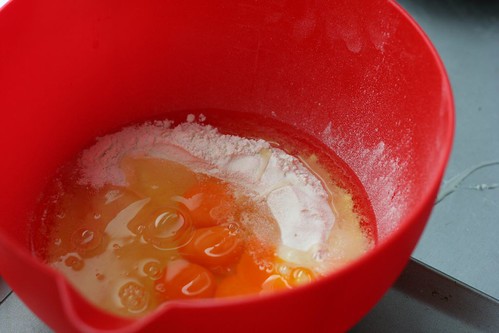
Mix flour, salt and eggs in a bowl, and add water little by little until you reach the right consistency. The batter should be rather firm, but still somewhat fluid. The ideal texture is slightly wetter than a bread dough, and quite a lot firmer than a pancake batter. Beat the batter with a wooden spoon until it goes smooth and starts forming air bubbles when beaten. Set it aside to rest for 20-30 minutes.

IMG_3482

Meanwhile, grate the cheese, bring water to boil in a large pasta pot, and then slice the onions in thin rings or half-rings. Melt a large knob of butter in a skillet, and fry the onions on a medium flame until they get brown and crispy. Don't do it too quickly, or the onions will go bitter. Let the onions drain on some paper towels.
Heat oven to 175 °C.

IMG_3485

When the dough has had its nap and the water is boiling, salt the water rather heavily, as for any pasta. Bring the water to a gentle simmer.
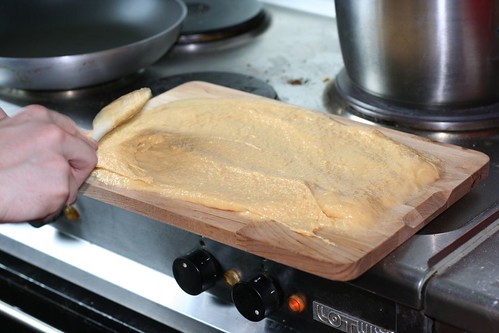
Spread the batter across a cutting board, and enjoy its lovely weird elastic texture.
Now use a knife to scrape small scraps of the batter straight into the simmering water. Work as quickly as you can, but don't worry too much if it takes a while.

IMG_3487

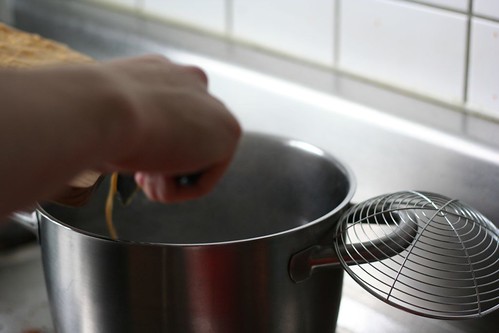
When the Spätzle rise to the top, they're done. Remove them in batches with a slotted spoon, and set them in a small ovenproof tray. Between layers of Spätzle, layer in some of your grated cheese, and top it all off with the last of the cheese.
Place the tray in the oven until the cheese has melted nicely, then remove, sprinkle with the onions, and serve with a green salad.

IMG_3490

Don't tell your cardiologist I gave you this recipe.

Friday, July 25, 2008

Olof Viktor's Sourdough Bread

IMG_3474

I really love bread. There is nothing as satisfying as kneading a dough, feeling it change character and consistency, shaping it, watching it rise, and finally placing in the oven to bake. And when it's ready, and you take it out of the oven and smell it, your mouth waters. Once you've taken your first bite, you sigh, and enter heaven.

Home-made bread always tastes great, but some taste better than others. That trusted old recipe you've used so many times you never bother measuring anything anymore because you know it by heart, is always tasty, but sometimes you just want more. And more is what you'll get if you buy the book Bröd (means "Bread", and is available in English), written by Swedish pastry chef Jan Hedh. The recipes are quite time-consuming, and probably what you would use in a professional bakery, but you will get great bread every time.

I highly recommend buying a bread/pizza stone, since the bread will be so much better when baked on one -- you won't get closer to wood-fired oven baked bread than this (if you don't have a wood-fired oven, of course). I made the mistake of leaving my bread stone back in Sweden, and I've missed it every single day.

The first recipe I tried from Bröd is a white sourdough bread. It takes at least two days to make, but it really, really, really is worth it.

Oh, the crust!

Oh, the texture!

Oh, the taste!

It is quite amazing how a simple wheat bread with a wheat sourdough can come out tasting so much, but this bread really is chock full of flavour. Simple, yet complex, and oh, so delicious! I'm also quite proud that I managed to make it look so good, but that's beside the point.

Olof Viktor's Sourdough Bread, from Bröd by Jan Hedh, page 43

IMG_3480

The instructions assume you have a kitchen appliance with kneading hooks, but you can knead it with your hands (I did). This will take a bit longer, and your arms will get really tired, but see it as a form of exercise.

Day 1

Prefermented dough

2 grams fresh yeast
150 grams water
200 grams high-gluten wheat flour
2 grams salt

1. Dissolve the yeast in the water, and add to the flour you've put in a large bowl. Knead on low speed for 10 minutes.
2. Add salt, increase speed and knead for another 5 minutes.
3. Place dough in a lightly oiled container and put it in the fridge for 24 hours, or leave it out for 3 hours.

Day 1 or 2

Final dough

15 grams fresh yeast
500 grams water
1000 grams high-gluten wheat flour
350 grams wheat sourdough
20 grams sea salt

1. Dissolve the yeast in the water and pour over the flour, preferment and sourdough, and knead for 13 minutes. Add the salt, increase the speed and knead for another 7 minutes.
2. Place dough in a lightly oiled container and let rest for 60-90 minutes.
3. Sift a thick layer of flour onto a baking tray. Gently divide the dough into four parts, without pressing the air out of them, and place on the tray.
4. Gently fold the dough -- and again, be careful not to press out the air -- and place with the "seam" down, facing the tray.
5. Place the baking tray in the fridge, and let rise over night, or for about 14-16 hours.
6. Pre-heat the oven to 250 C / 480 F, with either baking stone or a baking tray inside.
7. Bake the bread, two at a time, with the seam facing upwards. Spray them generously with water, or place some ice cubes/a cup of water on a tray in the bottom of the oven.
8. Lower the heat to 200 C / 390 F after 5 minutes. After another 10 minutes, let the steam out by opening the oven door. Repeat twice.
9. Bake for a total of 40-50 minutes, then place the bread on a cooling rack.
10. Spray the bread with some more water, for a crackly crust.

Repeat with the remaining bread.

IMG_3475


Check out YeastSpotting over at Wild Yeast, for all of your bread needs.

Sunday, July 20, 2008

Comfort In A Bowl

...and just like that, the weather turned on us. A week or so ago, me and Daniel went to Unterföhringer See for an evening swim, and the sun shone beautifully, with hardly even a breeze in the air. While enjoying the sunset and waiting for the bus to take us back home, a storm blew in from nowhere. In about two minutes flat, the weather went from serene, quiet and warm to howling-mad raining, with thunder and lightning as company. By the time we got home we were both soaking wet from running in the rain, trying to avoid getting hit over the head by pieces of old trees having got caught by the storm.

Thank God for the wine and Midsomer Murders episode we had waiting for us at home.

Although the weather calmed down a bit, it has stayed pretty much the same for a week or so, and everyone's missing the sun. With this kind of weather you don't really want to eat salads or fresh pastas, but rather something more comforting and warming. And what can be better than soup?

Daniel's mum gave me a wonderful cookbook this past Christmas, called Soppor, bröd och röror (Soup, bread and spreads), written by the two sisters Lisa Eisenman Frisk and Monica Eisenman. The book is divided into three parts (guess which ones), and every recipe comes with a suggested soup, bread and spread. Daniel suggested we make the lentil soup, and I'm not one to turn down lentils, so I jumped at the opportunity. The recipe was very simple and straightforward, and it turned out just lovely.

IMG_3428


As you can probably guess from the picture, I made pita bread to go with the soup, and Daniel made a lovely hummus that I can't stop thinking about -- it was sooo good! -- but today is all about the soup. If you serve the it with bread and some sort of spread you can easily feed four hungry persons, but the soup alone will feed only two. Unless you're not that hungry.

Oriental Lentil Soup, from Soppor, bröd och röror by Lisa Eisenman Frisk and Monica Eisenman

1 onion
2 cloves of garlic
2 Tbsp oil, for frying
1 tsp cumin
1 tsp cinnamon
1/2 tsp cayenne pepper
1 tsp paprika
150 ml red lentils
1 litre chicken or vegetable stock
400 g / 14 oz can of chopped tomatoes
2 Tbsp tomato puree
1 medium carrot
1 red bell pepper
1 yellow bell pepper
2 stalks of celery
Salt and pepper to taste
Chopped parsley

Instructions

Peel, chop and fry the onion and garlic in a saucepan for a couple minutes, until soft. Stir in the spices.
Rinse the lentils and put in saucepan. Add the stock, chopped tomatoes and tomato puree. Let simmer for about 10 minutes.
Peel and dice the carrot, peppers and celery, stir into the soup and let simmer for another 10 minutes, or until the lentils are soft. If needed, add more stock. Salt and pepper to taste. Add the parsley just before serving.

-----

We both really loved this soup, and the pita and hummus paired perfectly and made the meal more substantial. The heat from the chilies that I missed in the soup, Daniel put in the hummus instead. Next time I'll definitely add some more heat to the soup, but unless you're a chili nut, you don't have to.

Saturday, July 12, 2008

Lemon Panna Cotta

The weather has been really lovely lately, with temperatures around 30-35 C. This has made it a tad difficult to go outdoors without almost having an asthma attack, but I don't care, it's worth it! Even though the weather makes my brain scream "ice cream ice cream ice cream ice cream ice cream!" all day long, I have yet to actually do it. Shared kitchens aren't all that fun, and I wouldn't want someone's food or hot oil ending up in my custard. So there was no ice cream to be had, but I still wanted something cool and refreshing, preferably that didn't require too much work either, and what is easier than panna cotta?

Instead of Daniel's recipe, with only cream, I decided to try one of Tartelette's, with half cream and half milk. I flavoured the panna cotta with lemon zest, but if we had had mint at home I would've used that too, and perhaps lime instead of lemon.

The panna cottas turned out very light in both feeling and flavour, but since I've had no previous experience with powdered gelatin they turned out a little bit too jiggly. Next time I'll just use gelatin leaves.

Lemon Panna Cotta, adapted from Tartelette. Yields 2

citronpannacotta


Ingredients

125 ml milk
125 ml heavy cream
60 ml sugar
The zest from one lime
1 vanilla bean, split in half, and the seeds scraped out (NOT to throw away, mind you...)
1 teaspoon powdered gelatin bloomed in 1 Tb water (means to pour the water over the gelatin and let it sit while you prepare the panna cotta) (Note: this turned out to be too little gelatin to make the panna cottas set, but I don't know if the amount is wrong or if I just fucked it up.)

Combine all the ingredients, except the gelatin, in a saucepan over medium high heat and bring to a boil. Remove from the heat and let the cream to steep for 20 minutes. Pass the mixture through a sieve or a chinois, heat the gelatin in the microwave for 8 seconds and quickly stir it in the cream mixture. Divide it evenly among small dishes, glasses, etc...Let set in the refrigerator for at least 3 hours.

Serve with berries or a coulis.

Friday, July 4, 2008

Swedish Meat Balls (Köttbullar)

Returning to the theme of Swedish home cooking, today we take a look at Köttbullar, the Swedish meat balls. These tasty little balls (god I love saying that, please don't hate me for it) are mandatory on the Christmas smörgåsbord, and are served as a quick everyday dish in homes all over that oblong country called Sweden. They were always rather well known abroad, but IKEA has brought them to tables in their warehouses all over the world, ensuring that people everywhere have a chance to try them.

The only sad thing about this story is that IKEA's meat balls just aren't that good. They're decent, but they belong in the category of pre-made, frozen and reheated meat balls that my family affectionately calls "bouncing balls" (studsbullar), due to their rubbery texture. The home made version is another dish entirely, and belongs in the category of simple home cooking that brings you back to your childhood, where your mother served you this perfect comfort food.

Mothers, yes. More or less every mother in Sweden has her own meat balls recipe, and the term mammas köttbullar (mom's meat balls) is used to denote anything with that real emotional aspect to it: nobody makes meat balls like your own mother. Me, I'm not a mother, nor am I likely ever to be, but since November 2007, I am an uncle, so I guess my meat balls are morbrors köttbullar (uncle's meat balls) instead. Not that my little nephew Henning has tasted them, but maybe he will one day.


Morbrors köttbullar

The problem with ground meat is that it can easily get a boring, dry texture and swell in your mouth in a nasty sort of way. To avoid this, generations of Swedish mothers have added breadcrumbs soaked in water or milk to moisten the mixture, and eggs to bind it together. I use heavy cream instead, and I advise you to do the same, the difference in taste is bigger than the difference in fat content. Another trick to help keep the meat balls juicy is to use a 50-50 mixture of ground beef and ground pork.

Like most traditional Swedish dishes, meat balls are seasoned very lightly, the recipes calling only for onions, salt and white pepper. I like to add a bit of tabasco to give them a sort of background heat, without actually tasting of chili, but that's optional. Most people put the onion through a fine grater to create onion mush, while I prefer to chop it. Chopping it gives you little pieces of onion ingrained in the meat, which I think gives a better texture, but it does make the balls a bit more brittle.

This recipe is the usual amount that I make for 2 people, but it probably serves 3-4 adults, especially if you add a salad and dessert to the meal.

Ingredients
500 g of ground meat, preferably 250 g each of ground beef and pork
1 onion
2 Tbsp of bread crumbs
3-5 Tbsp of heavy cream
1 large egg
salt
white pepper
(5-7 dashes of tabasco)


Instructions

Put the bread crumbs in a bowl large enough to mix all the ingredients, and cover with the cream. Let sit for 5-10 minutes to let the bread crumbs absorb the cream. Rather finely chop (or finely grate) the onion and add it and the egg, some salt, pepper and the tabasco to the crumbs and mix.

IMG_3284

Something along these lines. Not too bad looking with the red onion, but please ignore the dirty pot in the background. It's one of those perks of sharing a kitchen with 11 students.

Mix in the ground meat, massaging the mixture until it goes smooth. If it feels grainy, add a little more cream. Season with salt and pepper to taste. This last step can be hard if you're squeamish about tasting raw ground meat, which I am not, but unfortunately, I don't know the amount of salt and pepper necessary; I taste my way to it.

IMG_3288

Your mixture should look something like this when amateurely photographed in heavy backlight.

Wash your hands off, and rinse them with cold water. Grab pieces of the mixture and roll them between your hands into meat balls, about 2-3 cm across. Place them on a slightly moist cutting board.

IMG_3290

When all the balls have been rolled, heat a generous amount of butter in a skillet (preferably cast iron), and give the balls a nice browning on high heat, then lower to low to medium heat and fry them evenly (just shake the pan, they should roll around nicely) for about 5-10 minutes. You'll probably need two frying pans, or to fry them in batches. When you think they're nearing completion, try one. The ideal is that it should have just a little hint of pink in the middle, and drip juices when you cut into it. Don't overcook them: nobody likes them tough and dry.

IMG_3292

Alright, that's it! To serve traditionally, boil some potatoes, and make a sauce by deglazing the skillet with some water and then add some cream or milk, a little bit of starch to thicken, and some soy to give a nice color. Serve the meat balls with the potatoes and sauce, some lingonberry jam and perhaps pickled cucumbers.

IMG_3295

We made these for our midsummer's supper, so here's a picture of the finished meatballs along with some other traditional Swedish midsummer's food: pickled herring with sour cream and boiled eggs, beer and spiced vodka (snaps).

Tuesday, July 1, 2008

Lemon & Cardamom Scones

Just like chocolate balls, scones are another thing every young Swede gets to bake in home economics, and is very popular as breakfast bread among my friends. It is, however, almost completely unheard of among everyone I've met so far in Germany. They haven't even heard the name, let alone tasted or baked one, which I find a bit funny since it's so common back home. I just assumed it was popular everywhere, but I guess I was wrong. Pity, though, since scones are so easy to make, and almost impossible to fail with.

I have two defaults when it comes to scones--regular ones and whole-wheat ones. I've made both a million times, and I don't even bother measuring the ingredients anymore because I already know how the dough is supposed to feel and behave. Comforting as it is to be able to produce delicious scones while blindfolded and with one arm tied behind my back, I'm beginning to feel like experimenting. This wasn't really a conscious decision, the thought just came to me one morning that I wanted to make scones flavoured with lemon zest and cardamom seeds.

So I did.

They were delicious.

Lemon & Cardamom Scones

IMG_3327


550 ml wheat flour
2 tsp baking powder
1/4 tsp salt
50 g butter, cubed
zest from one lemon
1 tsp cardamom seeds, finely ground
200 ml milk, yoghurt or sour cream

Pre-heat oven to 250 C.
Sift together all dry ingredients.
Add butter and incorporate well using the tips of your fingers or a fork until the mixture is crumbly.
Add the fluid and mix together--the dough will probably be a bit sticky, but that's okay.
Divide dough into 6-8 parts and roll into buns. Place on a baking sheet and prick them lightly with a fork.
Bake for about 10 minutes, or until golden brown.

Serve with orange marmalade, or lemon curd.

IMG_3324

Next time, I think I'll try a nutty scone.
(That should pair nicely with my even nuttier boyfriend, right?)