For the first three months of this year I was unable to bake anything. I lived with Daniel in a
very small flat - 16 square meters / 52 square feet small - where it was hard enough to boil a pot of pasta, let alone create all those wonderful dishes and desserts we had grown accustomed to back in Sweden. We had no oven, hardly a stove and a pitiful excuse for a refrigerator. And no, absolutely no working space. Needless to say, we grew tired of it, and moved.
Now that I actually do have a proper kitchen again, one would think that I already would have baked my arse off. But since it is not
my own kitchen, we do not really know each other yet, and I do not feel too comfortable working in it. Oh well. All in good time, and so on.
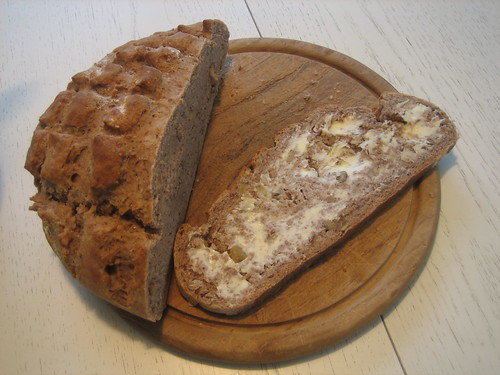
Just the other day, I baked my first loaf of bread for the year. Yes, yes, I know, April is already coming to an end, there is no excuse. However, since the bread was a complete success (the first loaf was apparently gone in under ten minutes), I shall waste no more time! Bread-baking, here I come!
Walnut BreadThis recipe originally comes from the Swedish cookbook
Soppor, bröd och röror written by Monica Eismann. I changed it quite a lot, adding different types of flour and ground almonds. Next time, I will add the almonds whole instead, and also add hazelnuts.
But yeah, it was gooooooood!

Ingredients50 g fresh yeast
700 ml lukewarm water
1 tbsp walnut oil
2,5 tsp salt
200 g walnuts, slightly crushed or coarsly chopped
200 g ground almonds
200 ml dinkel flour, whole-grain
300 ml rye flour
500 ml (or more) wheat flour, high protein type
InstructionsCrumble yeast into the (large) bowl of your stand mixer with paddle/dough hook attachment and dissolve in the water with oil and salt. (You could of course knead it by hand, but it will take longer to finish.)
Add the everything except for the wheat flour, and start kneading. Gradually add the wheat flour, about 200 ml at a time, until the dough is smooth and does not stick to the sides of the bowl.
Cover bowl with plastic wrap or a clean kitchen towel, and let rise for one hour. (Make sure it is not too cold or drafty.)
On a floured surface (e.g. kitchen table), divide the dough into two equally large parts. If the dough seems too sticky, knead some more flour into it. Shape the bread into two round balls, cover with plenty of flour and let rise underneath a kitchen towel for another 30 minutes, making sure to switch on the oven to full whack in the meantime. If you do not have a bread/pizza stone, leave the oven tray
Using a very sharp knife, cut a criss-cross pattern into the loaves, then carefully place the loaves onto the oven tray. Place a couple of ice cubes (or pour a glass of water, or spray with a spray bottle) on a tray in the bottom of the oven.
Reduce the temperature to 250 C and bake for 15 minutes, and then reduce the temperature to 175 C and bake for another 20-30 minutes. The loaves should be golden brown, and make a dull sound when tapped gently on the bottom.
Let cool. Eat. Eat some more.